

How To Draw A Parrot Sitting On A Branch
The parrot is a bright and exotic bird, and the image with it, decorated in a beautiful baguette, can very effectively look on the wall of the room. If you want to draw a parrot, you will first need a sheet of paper, a simple pencil and a soft eraser. You should start with a sketch. This is a very important part when creating a complete, complete picture. Indeed, in order for the image to look harmonious in the future, all its details must be thought out and correctly arranged, that is, located in the right places. You should also consider the size of objects, their ratio to one another, symmetry, etc.
Today we are drawing a parrot sitting on a branch. Try to arrange (place) it on the sheet so that the figure is in the center. From below, you can leave a little more space so that the branch on which the bird will be sitting in the future also fits well. First you need to outline two circles of a slightly oblong shape. The first, which is smaller, will be the head, and the second, which is larger, will be the body. Between these two ovals, draw a slightly curved line - a sketchy neck.
The next step, how to draw a parrot, will be a sketch of future paws. Note that in birds, the knees bend backward. Therefore, depict each foot in the form of two segments, located in relation to each other at a slight angle. Where your fingers should be, you can slightly outline two small circles. Schematically outline the branch on which the bird sits. She must cross both circles, which then become fingers.
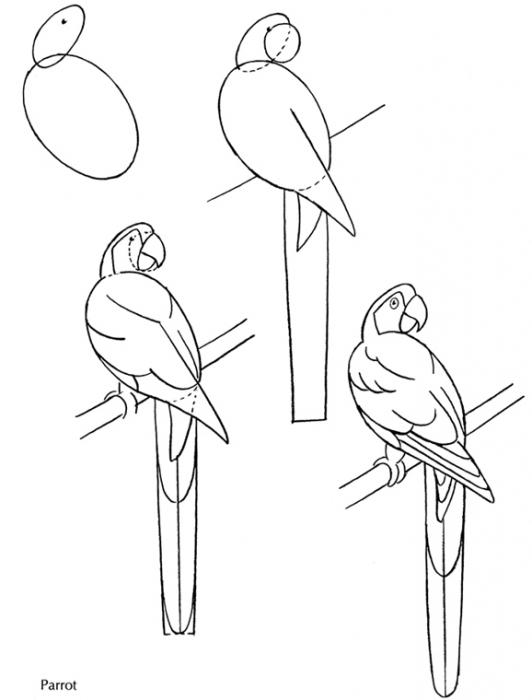
The next step, how to draw a parrot, is a sketch of its wings and tail. When folded, the wings of a bird can be slightly longer than the body. The tail in length can reach the size of the parrot itself, so behind the large oval (trunk), designate a segment approximately equal to its length along with the head of the feathered creature. Mark the curved beak of the eye. A preliminary sketch can be considered ready, so proceed to the next step, how to draw a parrot.
We begin to study the bird in more detail, getting closer to the intended goal. We draw a bit stronger around the contours of the head, trunk, and wings. When drawing the legs, note that closer to the base they are thicker. Some parrots in these places have "panties" of fluff, so the upper part of the legs can be hidden under such a plumage. The lower limbs are thinner. Where we previously drew circles, fingers with claws should now appear. Since the bird sits on a branch, it goes without saying that it clings to it. Therefore, the fingers should be bent accordingly. Detail beak and eye. Work out the twig.
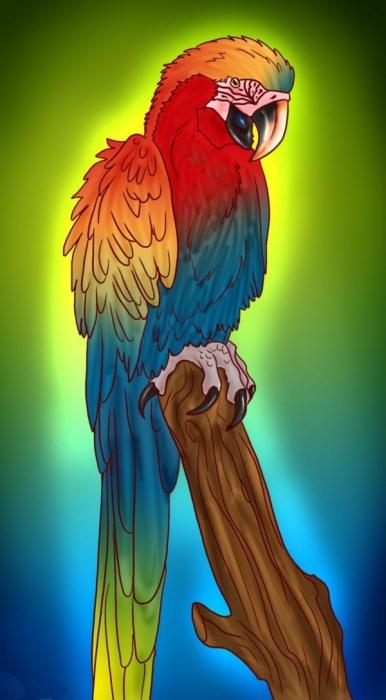
It remains to erase the auxiliary lines to get a clean picture, which can now be painted. Here, let your imagination and colors, colored pencils or pastels, etc. come to your aid. Make the budgerigar plumage bright and fun. Add some shadows for the volume, select a few individual feathers. On the wings and tail, you can depict a pattern or make them generally of a different color.
There is practically no limit to the imagination of how to draw a parrot. Relive the picture with an unusual background. But remember that it should not be brighter than the bird itself, otherwise the parrot will simply "get lost" and will look flat.
How To Draw A Parrot Sitting On A Branch
Source: https://geek-tips.imtqy.com/articles/20092956757716163/index.html
Posted by: simontonwitedingued.blogspot.com
0 Response to "How To Draw A Parrot Sitting On A Branch"
Post a Comment